Seppo guide
On this page
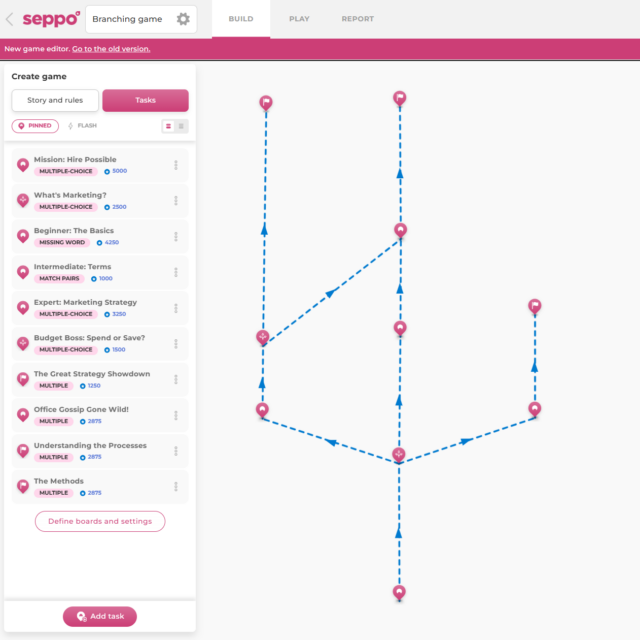
Branching game paths
1. Branching game paths
The Branching game feature can be enabled in Game Settings > Advanced > Game Mechanics. This feature allows you to create games where a player’s choices influence the progression. While tasks follow a set order, you can design multiple branching paths for players to choose from. Path selection can be based on a player’s answers or left open for free choice.
How to create a branching game:
Enable the Branching game feature from the Game Settings.
Set up a starting task.
Connect tasks to form branching paths.
(Optional) Configure specific choices to lead to designated paths.
Define goal tasks that conclude each path and end the game.
2. Setting up a starting task
Before a starting task has been defined, all task pins appear with a grey color on the game board. This means that they are currently inactive because they have not been connected to each other yet.
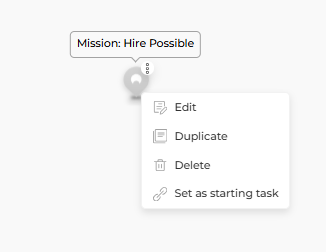
Here’s how to set up a starting task:
Hover over the desired task with a mouse.
Click the three-dot menu on the top right corner of the task.
Click “Set as starting task” option.
The task should now activate and turn to a pink color. Now you can start creating branching paths from this task.
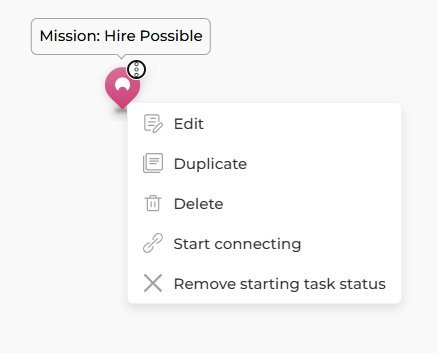
3. Connecting tasks
Click the three-dot menu again and this time select the “Start connecting” option. Hover over another task. A button appears that says “Connect here”. Click it to form a connection. If you want to cancel connecting, click the “Cancel” button at the top of the game editor. After a connection has been made, a line appears between the tasks to indicate it. The connected task has now also become active and new connections can be made from it.
You can make multiple connections from an active task. This creates a ‘crossroad’ task pin. This pin indicates that the task can lead to multiple different paths.
4. Configuring Player Choices to Lead to Specific Paths
Players can progress from a crossroad task in two ways:
By free choice – Available for all task types, allowing players to select their own path.
Based on a specific answer – Available for multiple-choice tasks, where each answer can lead to a different path.
If a crossroad task does not have a specific answer-based destination, players are free to choose their next path after completing it.
Configuring Answer-Based Paths
Inside the task editor, when the first task inside a crossroad task is a multiple-choice question, answer options can be set to direct players to different paths.
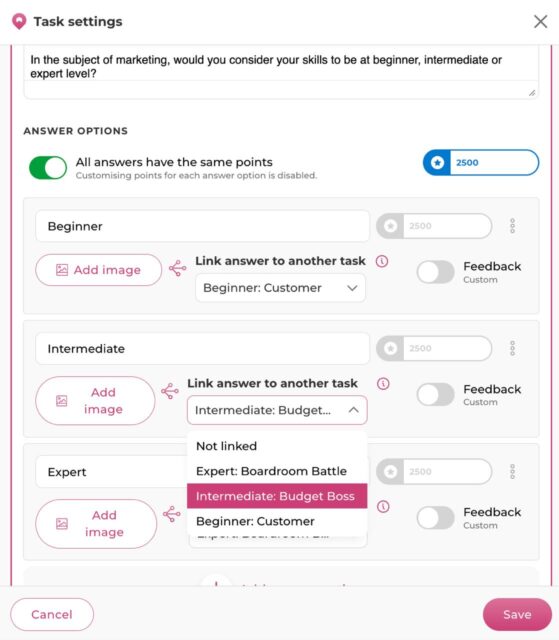
For example:
Multiple-Choice Task:
“In the subject of marketing, would you consider yourself a beginner, intermediate, or expert?”
- Beginner → Leads to a path with easier tasks.
- Intermediate → Leads to a path with moderate difficulty.
- Expert → Leads to a path with advanced, challenging tasks.
5. Setting up a goal task
How to set up a goal task:
Hover over the desired task with a mouse.
Click the three-dot menu on the top right corner of the task.
Click “Set as goal task” option.
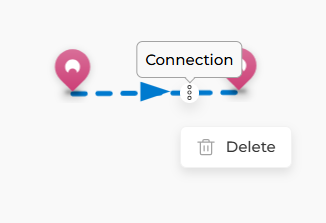
6. Deleting a Connection
To remove a connection between two tasks:
Hover over the connecting line between them.
Click the three-dot menu that appears.
Select "Delete" to remove the connection.

Best practices and tips
If you want to create ‘dead ends’ in the game that encourage players to reconsider their previous answers, it’s recommended to enable the “Allow players to improve their answers” feature. This allows players to revisit previous tasks and submit new answers, giving them a chance to get back on the right path.