Seppo guide
Game levels
What are Game levels?
To enable levels to a game, go to Game Settings > Advanced > Game Mechanics. This feature allows tasks to be divided into levels, adding structure, challenge, and a sense of progression to the game. By default, a game can have up to four levels. Once a player meets the unlocking requirements you’ve set, the tasks in the next level become available for completion.
How to Use Levels:
Enable levels in Game Settings.
Add levels from the left panel of the game editor.
Set unlocking requirements for each level.
Move tasks between levels by adding or relocating them.
Enabling levels
Enable levels in the Game Settings. Once levels are enabled and changes are saved, new sections appear in the left panel: First Tasks and Level 1. If the game already contains tasks, they will be automatically moved to Level 1 by default. Tasks can be relocated by clicking, holding, and dragging them between sections.
Tasks in the First Tasks section open automatically for the players when they join the game. Since players do not need to manually locate and open them, these tasks are not displayed on the game board. This section is ideal for introductory tasks that provide context and build excitement at the start of the game.
Adding levels
Enabling levels also adds an “Add Level” button to the left panel. Clicking this button allows you to create additional levels, starting with Level 2.

When adding a new level, you can configure:
The name of the level.
Unlocking requirement: The number of completed tasks required to unlock the level.
Unlocking requirement: The number of points needed to unlock the level.
Unlocking requirements can be used individually or together. For example, a level may unlock after a player completes five tasks, earns 5,000 points, or both conditions are met.
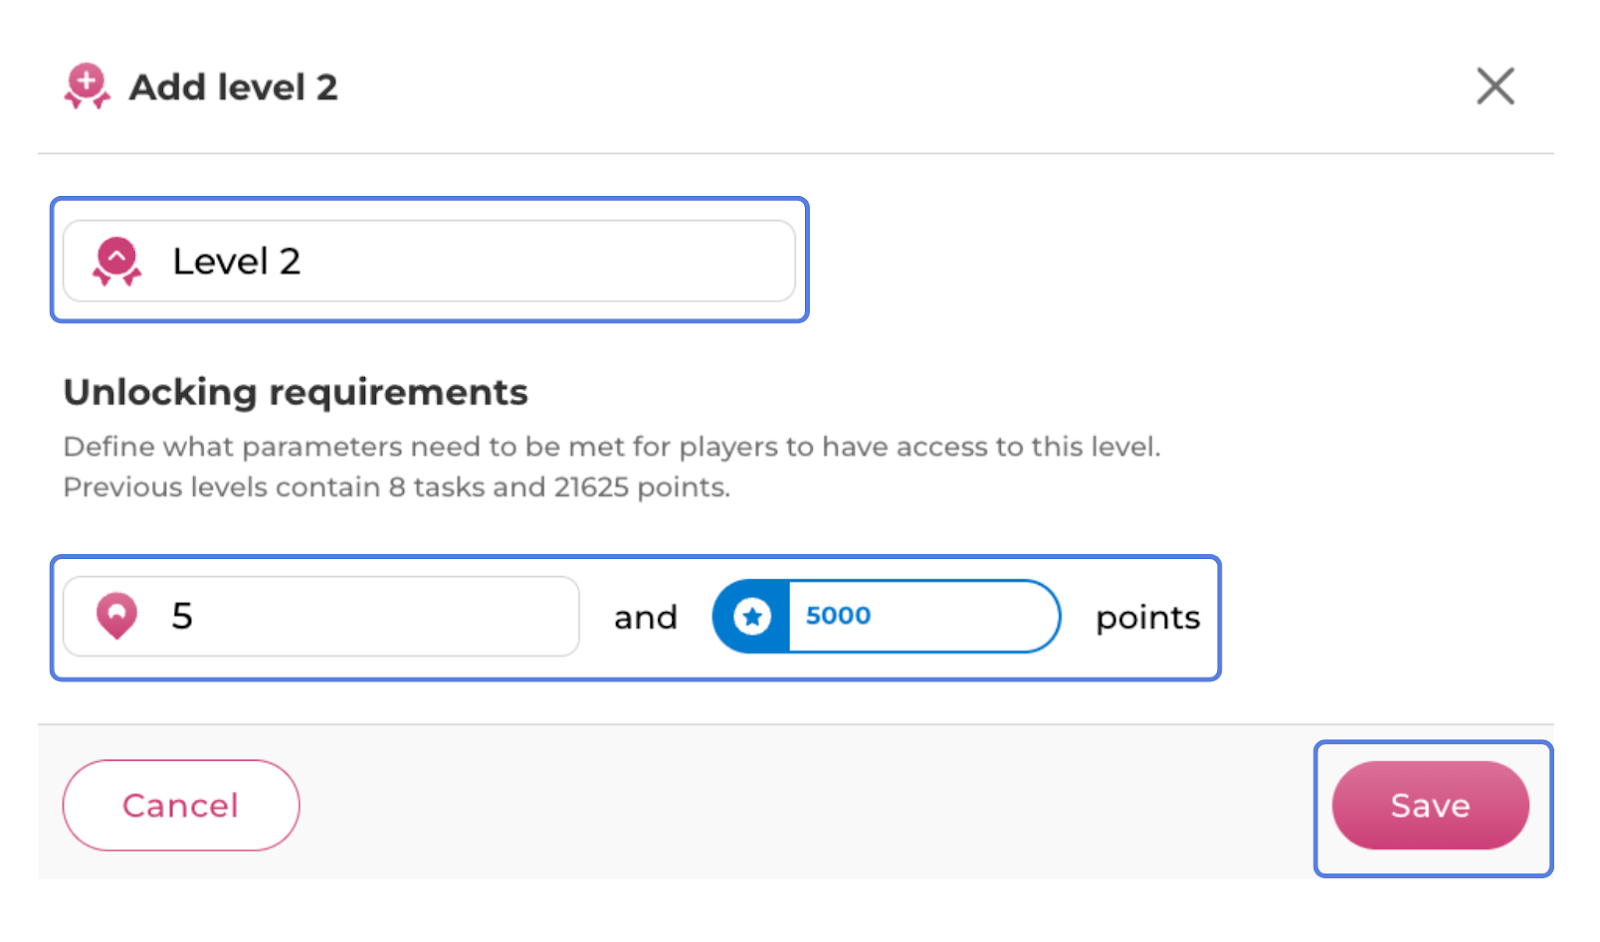
Once saved, the new level will appear in the left panel along with its unlocking requirements. These requirements can be modified at any time via the three-dot menu. Tasks can then be added or moved to this level as needed.
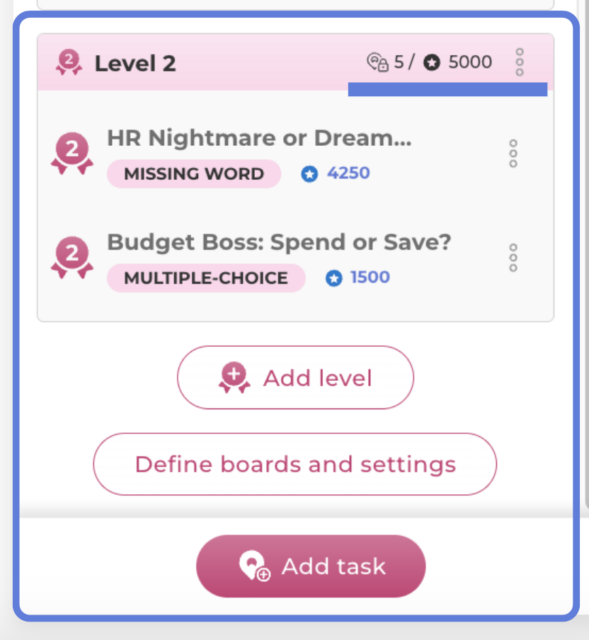
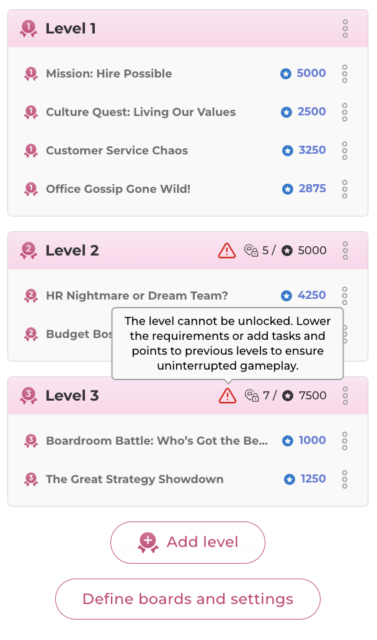
If you choose to move tasks around after you have created levels, make sure that the new structure still complies with level unlocking requirements.
For example, if Level 2 requires the player to complete 5 tasks, the level and its tasks cannot be unlocked if Level 1 only has 4 tasks. In a case where the level requirements do not match with the current task distribution, a red triangle warning is shown in the left panel next to the level area.
How to add tasks to a specific level?
Tasks can be assigned to a level in three ways:
Using the task editor – Select the desired level from the drop-down menu next to the task name field.
Via the left panel – Click the three-dot menu next to a level and choose to add a task.
Drag and drop – Add a task to any level, then click, hold, and drag it to the desired location in the left panel.

Best practices and tips
Enabling Exploration mode in the game settings allows your game to include up to 10 different levels and game boards.
💡 Note: Levels cannot be used when the Branching game feature is enabled.