Seppo guide
On this page
Player instructions
To ensure the best possible gaming experience, it’s essential to provide players with clear instructions about the game’s structure and mechanics.
1. Choose how players can login to the game
Before starting the game, determine which login method your players will use. The most common ones are with a PIN or QR code or via a link. You can find more details about different login options in the “Player Login Options” article in the Seppo Guide.
For example, if you’re using PIN code or QR code login, instruct players to:
- Enter the game’s PIN code in the “Type code” field at play.seppo.io
- Or scan the QR code using their device.
2. Remind players to save their player code
It’s crucial to instruct players to save their player code. This code is automatically generated by Seppo based on the name they enter and is required to log back in and resume a previous session.
Players are reminded to save their code at the start of the game, and they can also find it anytime in the Profile menu while logged in.
Here’s how a player can rejoin a game:
Navigate to play.seppo.io.
Click the "Continue existing game.".
If returning within two hours, Seppo will automatically suggest the previous session on the left side of the screen. Click "Continue this game" to resume.
If the session is not listed, enter the player code in the "Type here" field to log back in.

3. Player device settings
Some games require device permissions (such as location and camera access) to function properly. For example, a live map game that relies on GPS will not work unless location permissions are granted.
Players must enable these permissions in both their device settings and browser settings. To ensure a smooth and enjoyable experience, make sure all necessary permissions are configured before starting the game.
Seppo will automatically prompt the player to grant the necessary permissions when an action in the game requires them.
If a player is using a device with parental controls or safe mode enabled (e.g., Google Family Link, iOS Screen Time, or school-managed devices), certain permissions like camera, microphone, or location access may be restricted. If permissions aren’t prompting, check the device and browser settings to ensure access is allowed.
4. Game’s settings and features
If your game includes any special features or settings, it’s a good idea to inform your players so they understand the mechanics and structure from the start.
For example, enabling Exploration Mode increases the maximum number of levels and game boards, along with a separate navigation system for switching between boards. Make sure to communicate this to your players by providing instructions in person or by adding details to the Story and Rules section of the game.
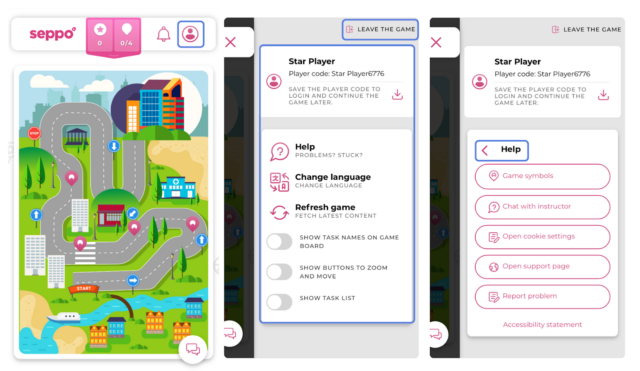
5. Profile menu and Support
Players can access extra instructions and settings from the Profile menu, located in the top-right corner of the player interface.
The menu includes:
Leave the game – Log out and exit the game.
Player code saving – Save your player code to resume the game later.
Help.
Change language – Switch the game’s language.
Refresh game – Reload the game if needed.
Show task names on the game board.
Show zoom and movement buttons.
Show task list.
The Help menu has following items in it:
- Game symbols explanation
- Chat with the instructor
- Open cookie settings
- Access the support page
- Report a problem
- View the accessibility statement

Best practices and tips
Players can report technical issues to the development team using the “Report problem” button. This feature is meant for reporting actual bugs or malfunctions in the system. Messages are not reviewed in real time and cannot be responded to unless the player provides their contact information.